Don’t let the sight of the electric water heater tomorrow intimidate you; its installation should be possible for you if done properly. The installation, if done properly, shields the chaotic working of electric water heaters which allows them to deliver hot water whenever problems arise. Everything will be explained clearly in this article so you won’t find it difficult to follow the instructions to help install the electric heater.
Electric Water Heater Installation: Step by Step
The most significant fact is that electric water heating systems do not require gas lines and therefore can operate normally in places with fuel gas scarcity. This makes great appliances for both new and existing homes looking to have a water heater. If you wish to install a new water heater as part of home upgrades, it is of utmost importance to know how the heater installation works first.
Tools and Materials You’ll Need:
- Adjustable wrench
- Screwdriver
- Pipe tape (Teflon tape)
- Pipe cutter
- Hose
- Bucket
- Voltage tester
- Water heater blanket (optional for insulation)
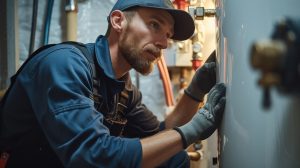
Step 1: Turn Off the Power Supply
Before beginning, safety is key. Locate the circuit breaker for your current water heater and switch it off. Use a voltage tester to ensure there’s no electrical current running to the unit.
Step 2: Drain and Disconnect the Old Water Heater
- Turn off the water supply: Shut off the cold water supply valve to prevent water from entering the tank.
- Drain the tank: Attach a hose to the drain valve and lead it to a safe drainage area.
- Disconnect water lines: Use an adjustable wrench to disconnect the inlet and outlet water pipes.
- Disconnect electrical wiring: Remove the access panel and disconnect the wiring using a screwdriver.
Step 3: Position the New Water Heater
Carefully place the new electric water heater in the desired location. Ensure it’s positioned on a stable, level surface with adequate space for maintenance.
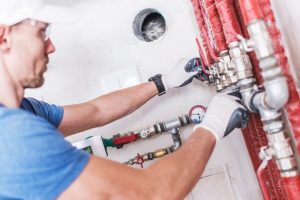
Step 4: Connect the Water Lines
- Wrap pipe tape: Apply Teflon tape to the threads of the inlet and outlet pipes.
- Attach water lines: Use an adjustable wrench to connect the cold water inlet and hot water outlet pipes securely.
- Check for leaks: Turn on the cold water supply and inspect for any leaks. Tighten connections as needed.
Step 5: Reconnect the Electrical Wiring
- Access the wiring panel: Remove the cover on the new water heater.
- Connect the wires: Secure the indicated wires (black to black, white to white, and ground wire) using wire nuts.
- Replace the panel cover: Ensure all connections are secure before replacing the access panel.
Step 6: Fill the Tank and Test the Unit
- Open a hot water faucet: This helps release air from the system while filling the tank.
- Restore power: Switch the circuit breaker back on to power the unit.
- Test for hot water: Wait for the water to heat and check for proper operation.
Additional Tips for a Successful Installation
- Insulate your water heater: Consider adding a water heater blanket to improve energy efficiency.
- Check the local codes: Ensure that your installation conforms with local building laws and regulations.
- Hire a professional if needed: If you’re unsure about electrical work, consult a licensed electrician.
Maintenance Tips for Your Electric Water Heater
To keep your water heater running efficiently:
- To remove sediment, drain and flush the tank on a yearly basis.
- Check the anode rod every few years to avoid corrosion.
- Monitor the thermostat settings to optimize energy usage.
Installing an electric water heater can save you money and improve your home’s energy efficiency. By following these steps, you’ll have a reliable source of hot water for years to come.
Inclusion and Final Thoughts
Installing an electric water heater can save you money and improve your home’s energy efficiency. However, not everyone has the same level of experience or tools at their disposal. If you encounter challenges during installation, don’t hesitate to seek help from a friend, family member, or professional plumber. Remember that safety and appropriate setup are top considerations.
By taking these measures, you will have a consistent source of hot water for years to come. Whether you’re a seasoned DIY enthusiast or a first-timer, this guide will ensure a smooth and effective installation.