How to replace a well pump is an intricate process, which includes a few steps and would require safety measures to be taken. At first, you may want to shut off the power of the pump for there might be an electrical risk. Following that, take off the cover to the well and dismantle the piping along with somehow also unbinding the wires attached to the pump. Make use of lifting tools or a pipe wrench to appropriately pull out the pump and the well’s piping. Look at the wear and tear of the old piping along with the pump and replace any component that seems to be faulty. Add the new pump by placing the piping, attaching the wires and then lowering the pump back into the well. For the last steps, the piping may be reattached, power may be restored and the pump can be tested for any possible complications in its working.
What is a Well Pump?
A well pump is a device that pulls water from an underground well and delivers it to your home. It’s an essential part of your water supply system. There are various types of well pumps, such as submersible pumps and jet pumps. Understanding your pump type is crucial before starting the replacement.

Signs Your Well Pump Needs Replacing
Low Water Pressure: Decrease in the water flow could be a sign that the pump is malfunctioning.
No Water: A possibility could be that the pump is completely out of service if any water is not being drawn out.
Constant Cycling: A pump that keeps turning on and off indicates that something is wrong.
Unusual Noises: There is also a chance of mechanical issues if the pump is making loud noises.
High Energy Bills: A malfunctioning pump could put in more effort causing a spike in energy bills.
Tools and Materials You’ll Need
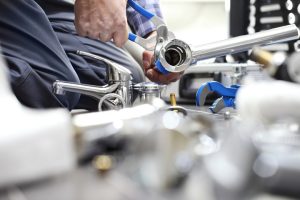
When it comes to performing a task such as replacement of a well pump, being equipped with the right tools and the materials needed is crucial. For the task you will require pipe wrenches, screwdrivers, electrical tape, voltage testers, and a replacement well pump and most importantly safety gear like gloves and a hoist or a rope for submersible pumps.
- Pipe wrenches
- Some screwdrivers
- Electrical tape
- Tester for voltage
- Replacement for a well pump.
- Use gloves for safety.
- Apply Teflon tape.
- A rope or a lift for submersible pumps.
Step wise approach How to Replace a Well Pump.

1. Power Down the System
Ensure to cut off the electricity supply to the well pump before connecting the wires. A voltage tester is able to determine whether the device has been turned off.
2. Ascertain the Type of the Well Pump
Check If it is a submersible pump (located within the well basin) or a jet pump (located above ground). Each needs a somewhat different strategy.
3. Let the System Drain
Reduce pressure within the system by forcing water above through a faucet and allowing any remaining water within the pipes to drain out. This step makes the process easier and safer.
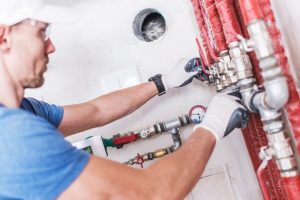
4. Disassemble the Old Pump
For jet pumps, detach the water pipes and unscrew the bolts fixed for mounting in order to disassemble the pump.
Ensuring there is no damage to the wires and the pump and its pipe, carefully use a hoist or a rope to extract the submersible pumps from the well.
5. Look through the Components
Look through the pipes, the wiring and the other extra parts for any signs of wear and tear. If any of the parts are faulty then replace them so that the new pump works effectively.
6. Set Up The New Pump
Submersible Pump: Attach a new pump to the pipe structure and lower it into the well using a rope or washing machine. The pump is then wired and fastened in position.
Jet Pump: Mount the pump by connecting the water pipes and tightening the placed bolts.
7. Wiring Connection
With removing the mechanical wire, connect the electrical wires to the new pump. All connections made must be secured with the use of electrical tape to prevent moisture damage.
8. Priming The Pump For Jet Pumps
Check and fill the pump casing with water in order to check if the pumping system is running well. For operating submersible pumps, this step is not required.
9. System Testing
Troubleshoot the pumping system by switching on the power. Identify for any leaks, unusual sounds, and water flow problems.
10. Performance Monitoring
In order to check the smooth operation of the system as well, monitor the overall performance for a few days.
Safety Tips
- Always turn off the power before working on the pump.
- Use safety gloves to protect your hands.
- If you’re unsure about any step, consult a professional.
- Avoid dropping tools or components into the well.
When to Call a Professional
Even though changing a well pump can be a simple home project, some conditions do require calling in an expert. If your well is too deep or if there are electrical complications, the better option would be to consult a certified plumber or technician.
Conclusion
Changing a well pump does not have to be an intimidating process. With the right equipment and some skills, one could definitely fix the water supply issues, including water pressure. Carefully adhere to these steps, and additional steps, and reach out to professionals if required.
If you take proper care of your new well pump and inspect its functioning from time to time, you will be able to achieve an enduring and high performance water system in your house.